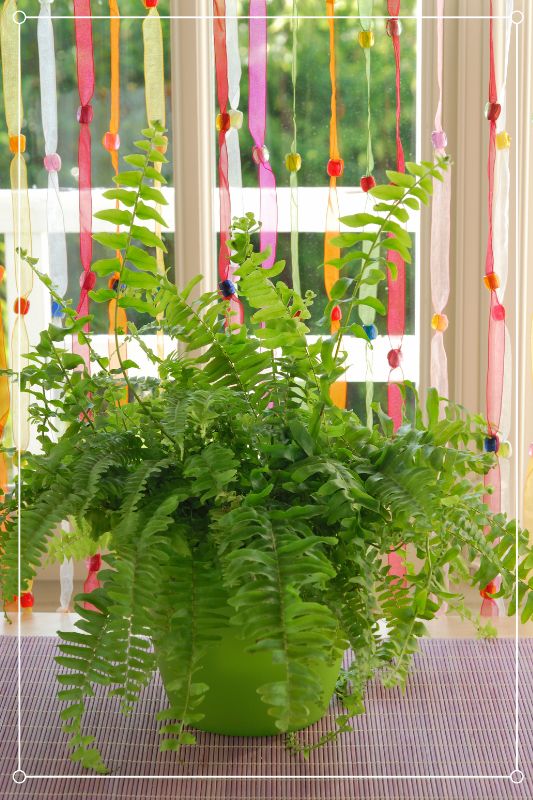
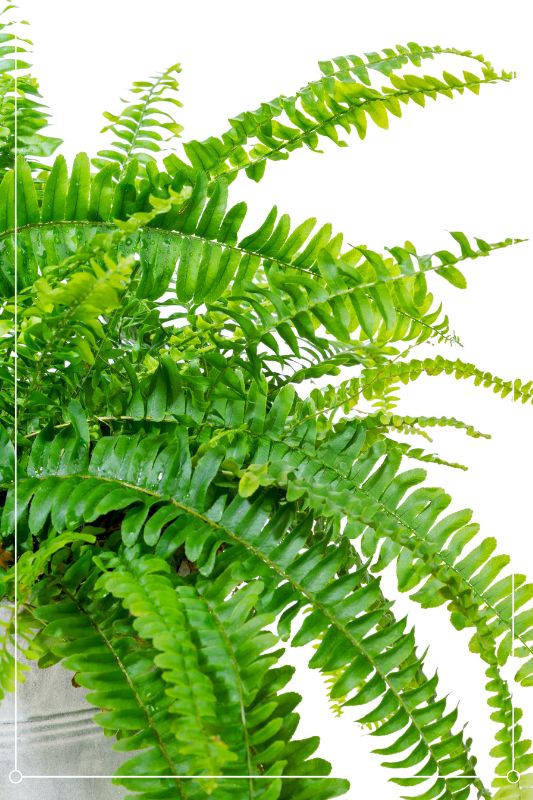
Nephrolepis exaltata ‘Bostoniensis’, commonly known as Boston or Sword fern, first appeared into the gardening world back in 1894, when a Boston florist noticed that one of the couple hundred ferns received from Philadelphia has arching fronds, hence its name. Since then, this cultivar has become one of the most popular houseplants out there and it occupies a special place in most indoor collections – and for good reason! Its arching foliage makes Boston fern perfectly fitted to be grown in hanging baskets or on plant stands. This way, you can enjoy a cascade of green leaves all year round!
Being a cultivar of Nephrolepis exaltata, which is a tropical plant native to humid forests, we can easily deduct what this fern needs to thrive indoors. And while this plant is not necessarily hard to grow indoors, it will require some TLC and special treatment from time to time. And to make sure your Boston fern is as happy as it can get, we’ve covered everything you need to know about its care in this guide!
Table of Contents
1. General Information
| Scientific name: | Nephrolepis exaltata ‘Bostoniensis’ |
| Common names: | Boston fern, Sword fern, Boston swordfern |
| Native to: | Florida, West Indies, Mexico, Central America, South America, Polynesia and Africa |
| Toxicity: | Non-toxic for for cats, dogs, and humans |
| Mature size: | 2 to 3 feet tall (60-90 cm) |
| Hardiness: | USDA zones 9 – 11 |
| Other Cultivars: | ‘Emina’, ‘Aurea’, ‘Delilah’, ‘Tiger’, ‘Verona’, ‘Fluffy Ruffles Upright’, ‘Mini Russels’ |
2. Boston Fern Care & Growing Requirements
» Watering
Boston ferns love lightly moist soil at all times during their growing season (spring and summer). Usually, watering it once or twice per week does the trick, but you’ll have to take into consideration its growing environment, as it can impact the watering frequency of this plant. The best way to decide if your Boston fern needs water is by checking if the soil feels dry to the touch. If the answer is “yes”, then you should give your Boston fern a drink.
During fall and winter you should reduce the watering frequency and water your Boston fern when the top of the soil feels dry to the touch, as this plant enters its dormant phase.
Make sure to use lukewarm or room temperature water, as cold water can damage your fern’s roots. Also avoid using softened water for prolonged periods, since this results in an accumulation of salts in the soil, which eventually injures the roots.
» Light
Boston ferns grow best in bright, indirect light. Full sun exposure will lead to scorched foliage, while total shade will cause sparse fronds and dim its appearances. Even so, your fern will enjoy the mild morning sun.
And if you’re planning to hang your Boston fern on your porch, make sure to place it in a spot that’s protected from direct sunlight. Bright shade and filtered morning sunlight works best!
» Soil
As mentioned above, Boston ferns thrive in slightly moist soil during their growing season. However, sitting in soggy soil for prolonged periods can cause root rot. That being said, the best soil for a Boston fern has to offer proper drainage, moisture retention and air circulation, while also being rich in organic matter and having an acidic pH between 5 and 5.5.
Commercial houseplant soil mixes work well enough as long as they contain porous, organic matter such as peat-moss. Adding perlite or coarse sand to your potting mix will help improve drainage and reduce the risk of root rot.
Keep in mind that Boston ferns have a shallow root system, so it’s best to use a planter that’s on the shorter side, while allowing about 1 inch (2.5 cm) of space between the roots and the container’s edges
» Temperature
Boston ferns thrive in average household temperature, so as long as the indoor temperature ranges between 65-75°F (18 – 23°C), your fern should be happy!
However, temperatures below 55°F (12°C) will damage your tropical fern, so it’s best to keep it away from cold windows during winter.
» Humidity
Since Boston ferns are native to tropical rainforests, where the humidity level is usually around 80%, it’s safe to assume that the humidity of most homes won’t do. To make sure your fern is thriving indoors, you should aim for 50% of higher humidity levels.
Placing your fern on a tray filled with pebbles and water is always a good option for increasing average humidity. However, make sure the pot doesn’t touch the water, as water can infiltrate through the drainage holes and lead to root rot. Frequent misting can also help, but it’s best to pair it with the pebble tray method, since it usually increases humidity around plants for shorter periods.
» Fertilizer
Boston ferns are slow feeders, which means they don’t need as much fertilizer as most houseplants. Feeding them once a month during their growing season (early spring through mid fall) with a balanced liquid fertilizer (20-10-20 NPK ratio) diluted in half, should offer the nutrients for proper growth.
Fertilizing your fern throughout winter is not recommended and can damage your plant. On the other hand, you can water it once a month with distilled water to help flush out the salt deposits that can accumulate in the soil due to fertilizer use.
3. Boston Fern Maintenance & Propagation
» Repotting
The ideal time to repot your Boston fern is in early spring, at the start of its growing season. Typically, repotting should be done once every two years, but it’s best to check yearly if its roots are popping out through the drainage holes or are starting to circle around its current pot. If you notice any of these signs, it means your fern is ready for an upgrade! Pick a container that’s around 2 inches (5 cm) larger than its current one and also has plenty of drainage holes.
Plastic or glazed terracotta pots will prevent your plant from drying out too quickly, which is best since Boston ferns love their moist soil. Keep in mind that their root system is shallow, so short containers are best.
» Pruning
Aside from the occasional removal of dead leaves and leafless runners, which can be done at any time, it is ideal to prune your Boston fern when you’re ready to repot it. This plant responds well to severe pruning, as it encourages new growth and a bushier appearance, so don’t be afraid to cut some stems here and there. However, you’ll want to focus on the side fronds at the base, leaving the top of the plant intact.
» Propagation
There are multiple ways to propagate a Boston fern, the easiest one being division, which can be done in early spring. All you have to do is carefully separate a healthy section of the plant with roots attached using a garden trowel and then place it in a new pot with fresh soil.
You can also propagate it via runners (leafless stems poking out of your fern). To do this, you’ll have to identify a few healthy runners that are not brown or crispy and cut them from the base of your fern. After that, you’ll have to place the runners on fresh soil, while making sure they come into contact with it, as that is from where the new roots will emerge. Keep the soil moist and wait. In a few weeks you should notice the results.
5. Common issues
» Dropping leaves
As your Boston fern matures and new growth emerges, older foliage might start to drop, which is not necessarily an issue. However, if this happens often and in large amounts you might want to increase its watering frequency and the humidity level. And if that’s not the issue, also check the soil for white markings, which is a sign of overfertilization and means that you’ll have to flush the soil in order to remove excess salts from it.
» Leaves Turning Yellow
Yellowing leaves in Boston ferns are one of the first symptoms of overwatering, but can also appear if the humidity and light levels are low, so make sure to optimize them accordingly.
» Leaves Turning Brown
There are multiple factors that can cause your Boston fern leaves to turn brown. The first thing you’ll want to do is make sure your fern is growing in adequate conditions, so make sure to follow the care requirements mentioned above. If that’s not the problem, it might be time to change your fern’s potting medium and feed it accordingly.
» Root rot
Root rot is caused by factors like overwatering, overfertilization, improper root aeration, poor drainage or the usage of inadequate soil. The best way to prevent root rot from appearing is to make sure your fern is growing in proper conditions. Some of the main signs of root rot are stunted growth and discolored, wilted or dropping leaves.
The first step to identifying root rot is checking the roots condition by removing the plant from its pot. If all the roots are mushy and black, it’s already too late for your Boston fern. However, if some of the roots are still healthy-looking, then there might be a chance to save it. Remove all the affected roots and fronds, disinfect both the pot and the plant (you can use a high-quality fungicide for your fern) and then repot it in fresh soil.
6. Boston Fern Diseases & Pests
While a healthy Boston fern is going to experience less issues with diseases and pests, it can still become a target for nematodes, mealybugs, aphids, fern mites, whiteflies, and blight. And because preventing an infestation is better than having to treat it, you should regularly check your fern’s fronds down to the soil level for any signs of damage.
Conclusion
While Boston fern is not necessarily a hard to care for houseplant, it has its specific requirements. But if you offer it the TLC it requires, you’ll have a healthy-looking plant for a long time!


No Comments