Are you tired of the guesswork when it comes to watering your indoor plants? You’re not alone. Today, I’ll discuss bottom watering, a technique that can actually change the way you care for your leafy buds.
In this article, I’ll share with you everything from the basics of bottom watering to the best practices for keeping your houseplants happy and thriving!
Table of Contents
1. So, what exactly is bottom watering?
Bottom watering is a method where water is absorbed from the bottom of the pot, which encourages the roots to grow deeper and stronger.
Unlike top watering, where water is poured over the soil’s surface, bottom watering ensures that moisture reaches the entire root system evenly.
2. Benefits of Bottom Watering
Bottom watering your houseplants comes with a lot of benefits:
- Optimal water absorption: When you water from the bottom, the entire soil absorbs moisture evenly. This is especially helpful for plants sitting in stone dry soil, where top watering can sometimes run off without soaking in.
- Healthier root systems: This method improves root development – they grow downwards, seeking moisture, which results in a stronger, more extensive root system. On the long run, this improves the overall health and stability of your plants.
- Reduced risk of diseases: The leaves stay dry, reducing the risk of diseases like powdery mildew or blight.
- Prevents soil erosion and nutrient runoff: Top watering, especially if done in a hurry, can cause soil erosion and the loss of essential nutrients. By watering your plant through the bottom, the soil structure will remain intact and nutrients stay put.
- Uniform soil moisture: Water distribution is even throughout the pot, eliminating dry spots often found in top-watered pots.
- Less stress on plants: Inconsistent watering can stress your plants. However, bottom watering provides a consistent moisture level, helping plants thrive in a stable environment.
- Ideal for Delicate Plants: Some plants are sensitive to water on their leaves or crown, such as African violets. Bottom watering reduces the risk of damage caused by droplets on leaves.
3. How to Bottom Water Your Plants
Bottom watering is as straightforward as the name sounds. However, compared to top watering, it will take you a bit longer to do it, especially if your plant count is high.
And while there is a lot of debate on the amount of water you should have in your container, my recommendation is to experiment and see what works best for your plants.
Step 1: Preparation
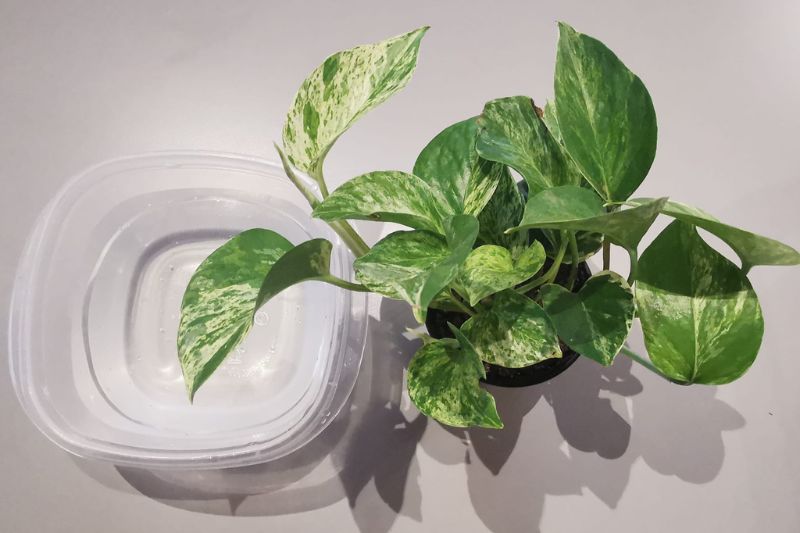
- Water selection: Use room-temperature water. If your tap water is hard or chlorinated, you can use filtered water to protect your plants from chemicals.
- Select a container: Choose a container that can comfortably fit your plant’s pot. This can be a basin, sink or tub – anything where your pot can sit in water without tipping over.
Step 2: Setting Up
- Water level: Fill your container with about 2-3 inches of water. The depth can vary based on the size of your pots but should at least cover the base of the pot.
- Adding nutrients: If it’s also time to fertilize, mix in water-soluble fertilizer with the water.
Step 3: Soaking the Plant
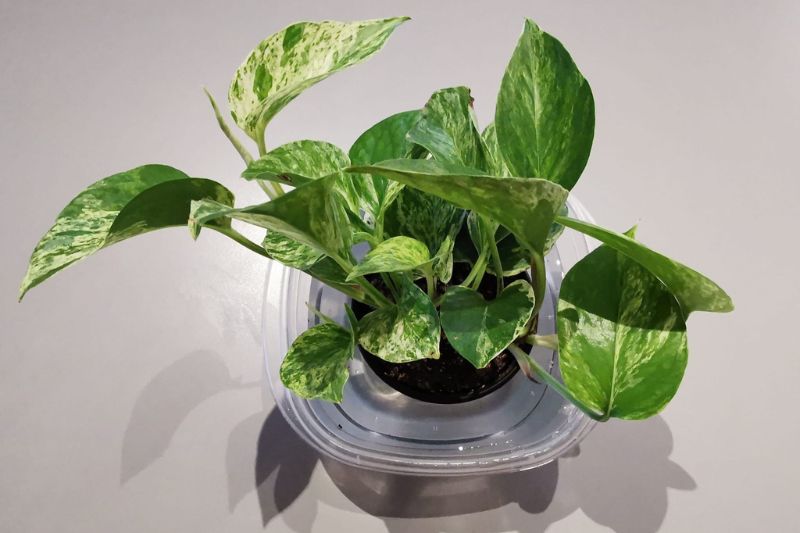
- Immersing the pot: Place your plant’s pot in the water. Ensure the water level is not so high that it enters the top of the pot. If your pot is floating, keep it in place until the soil absorbs some water and stabilizes itself.
- Wait: Let the pot sit in the water for about 15-30 minutes. Smaller pots usually take less time, while larger pots might need more. The key is to allow enough time for the water to wick up through the drainage holes and moisten the soil thoroughly.
Step 4: Checking Moisture Levels
- Soil test: After the soaking period, check the topsoil for moisture. It should feel damp to the touch. If it’s still dry, your plant may need more time in the water.
Step 5: Drainage
- Draining excess water: After the soil is sufficiently moist, lift the pot from the container and let it drain. This can be done by placing the pot on a rack or in an empty sink to allow excess water to drip out.
- Avoid waterlogging: Make sure your plant isn’t left sitting in water. This can lead to root rot and other issues.
Step 6: Return to Regular Spot
- Move your plant back to its spot: Once drained, place your plant back in its usual spot. Check for water that might have accumulated in the saucer or under the pot – this should be emptied to prevent sitting in stagnant water.
Additional Tips
- Regular checks: Monitor your plants for their next watering. Bottom watering doesn’t mean less frequent watering; it’s about how you water. It’s important to allow the soil to properly dry out (based on your plant’s needs) before watering it again, else you risk overwatering.
- Seasonal adjustments: Remember that houseplants may require more frequent watering in warmer months and less in colder months.
- Observation is key: Keep an eye on your plants for signs of over or under-watering and adjust the watering frequency as needed.
4. Ideal Plants for Bottom Watering
While almost any plant can adapt to bottom watering, some are particularly suited to it:
- African Violets: These beauties thrive with bottom watering, avoiding leaf spots.
- Snake Plants: They prefer their leaves dry and are perfect candidates for this method.
- Plants in Dry Soil: If your plant’s soil is bone-dry, bottom watering ensures thorough moisture penetration.
5. Common Mistakes and Solutions
- Overwatering: Even with bottom watering, it’s possible to overdo it. Always check if the topsoil is dry before watering again.
- Insufficient water: If the water doesn’t reach the topsoil, give it more time or add more water.
6. Balancing Bottom and Top Watering
While bottom watering is effective, don’t forget the occasional top watering every few months. This helps flush out salts and minerals that accumulate in the soil, keeping your plant healthy and happy.
FAQs About Bottom Watering
Most plants adapt well to bottom watering, particularly those sensitive to moisture on their leaves. However, it’s always best to research the specific needs of each plant. Some, like bromeliads and orchids with aerial roots, might prefer top watering.
The frequency of bottom watering depends on the plant species, pot size, and indoor environment. Instead of a strict schedule, check the soil’s moisture level. If the top inch of soil feels dry, it’s time to water.
Typically, 15-30 minutes is sufficient. However, larger pots or extremely dry soil might require longer soaking times. The goal is for the moisture to reach the top inch of the soil.
Bottom watering offers several benefits like promoting deeper root growth and reducing the risk of leaf diseases. However, it’s not necessarily better but rather an alternative method. Some plants may benefit from a combination of both techniques.
Yes, overwatering is still possible if plants are left in water too long or watered too frequently. It’s essential to monitor soil moisture and adjust your watering habits accordingly.
Yes, this can happen, especially if using hard tap water. To prevent buildup, occasionally top water to flush out the accumulated salts and minerals from the soil.
Plants that require dry soil conditions, like some succulents and cacti, might not be ideal for bottom watering as it can lead to overwatering. Plants that are very large or in non-movable containers may also be impractical to bottom water.
Conclusion
Bottom watering is a simple yet effective way to ensure your indoor plants are well-hydrated. By understanding the needs of your plants and following these guidelines, you can create a thriving indoor garden that brings joy and life to your space. Remember, every plant has its unique personality – get to know them, and they’ll flourish under your care.
And if you’ve tried bottom watering your plants, we’d love to hear about your experiences! Share your stories in the comments below and join our community of plant lovers. Who knows, you might just inspire someone else! 🌿💧



No Comments